Until ProcessMaker 3.0.1.7, ProcessMaker provides a self-installer package to install ProcessMaker 3 in Windows platforms. This user-friendly Windows Installer automatically installs and configure:
- ProcessMaker 3.0
- Apache
- MySQL
- PHP
- phpMyAdmin
Before installing ProcessMaker, check the Installation Requirements to see whether your server meets the necessary hardware and software requirements and do not forget to read the following recommendations:
Recommendations
| It is strongly recommended this self-installer package (.exe installer) be used to install Processmaker 3 for personal use only, and NOT on Production servers. Instead, do a Manual Installation. |
- Please check out our supported stacks page, and compatible browsers list.
- If using Internet Explorer 8, 9 or 10, enter the URL like: http://localhost:8080/. Do not forget to add the http:// protocol so that the browser redirects the page to ProcessMaker.
- If working with Internet Explorer 11, please read the Internet Explorer Compatibility page.
- ProcessMaker Community 3.0.1.7
- Apache 2.2.23
- MySQL 5.5.32
- PHP 5.4.16
- phpMyAdmin 3.3.7
- User: admin
- Password: admin
ProcessMaker Self-Installer Package
Download the Self-Installer Package (.exe installer) at ProcessMaker's SourceForge page. ProcessMaker versions are labeled according to its build number. Remember that the self-installer package is only available until ProcessMaker 3.0.1.7.
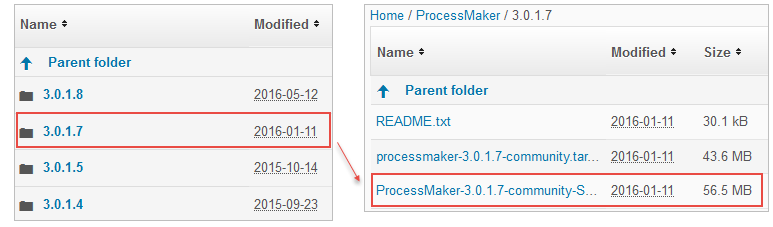
The package for ProcessMaker 3.0.1.7 is ProcessMaker-3.0.1.7-community-Setup.exe and will install:
ProcessMaker Setup
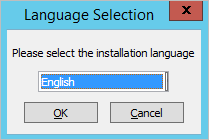
After downloading the installer, double click on it to begin the installation. Choose the language between English, Spanish or Brazilian Portuguese in the first dialog and click OK.
The Welcome Setup Wizard dialog will display, click on Next to begin the installation of ProcessMaker.

Mark the option to accept the GNU Affero General Public License version 3 license used by ProcessMaker and then click on Next.

To install in a different location, click on the Browse button and select a directory where Apache, MySQL, PHP, ProcessMaker and phpMyAdmin will be installed.

Next, decide whether to select the option for Enable heartbeat. The "Heartbeat" is used to collect anonymous statistics every seven days about the number of workspaces, users and processes being used. This information is collected to help the ProcessMaker developers identify usage patterns and help improve the application in the future. If you do not what this information to be sent to the ProcessMaker developers, do NOT select this option.

In the next dialog, check the settings for the installation which are displayed in the dialog box.If these settings are acceptable, then click on Next to begin the installation.

Please wait while ProcessMaker is installed.

The wizard will display the following dialog when the installation is complete. Check the box next to the message "Launch ProcessMaker" to open ProcessMaker, and click on "Finish" to complete the installation process.

First Login
Once ProcessMaker has been successfully installed, the web browser will be redirected to the login page. The Get Started screen will appear automatically.

Read carefully the content of the Welcome to ProcessMaker window. Note that by default, the self-installer ProcessMaker package creates an administrator user with the following credentials:
Important! The “admin” user will be able to access to all the features and functionality in your ProcessMaker installation, such as: system configuration, processes creation and editing, user and group management, case management, and report and dashboard oversight among others. Thus, it is strongly recommended you take care to configure a difficult-to-guess password for this account. Take a look at this list of password dos and don’ts. You may also consider using a strong password generator like this one.
Once done, to avoid seeing the Get Started screen on every subsequent login, mark the option Don't show me again and the screen will automatically be closed.
The login screen will be displayed. Enter the name and password of the administrator user created by default and the workspace configured by default, which is named workflow. Click on Login to enter processmaker.

The login page can be configured. For more information see Login Settings.
Note: If a previous version of ProcessMaker was accessed by the web browser, it is recommended to clear the browse cache after installing ProcessMaker to clear any stored pages from previous versions of ProcessMaker.

